It’s time! Halloween is just around the corner, and Dollar Tree is putting out their Halloween goodies. It’s time to get creative and crafty! It’s such a fun challenge each year to go to Dollar Tree with about $10-20 in hand and see what kind of interesting DIY ideas I can come up with.
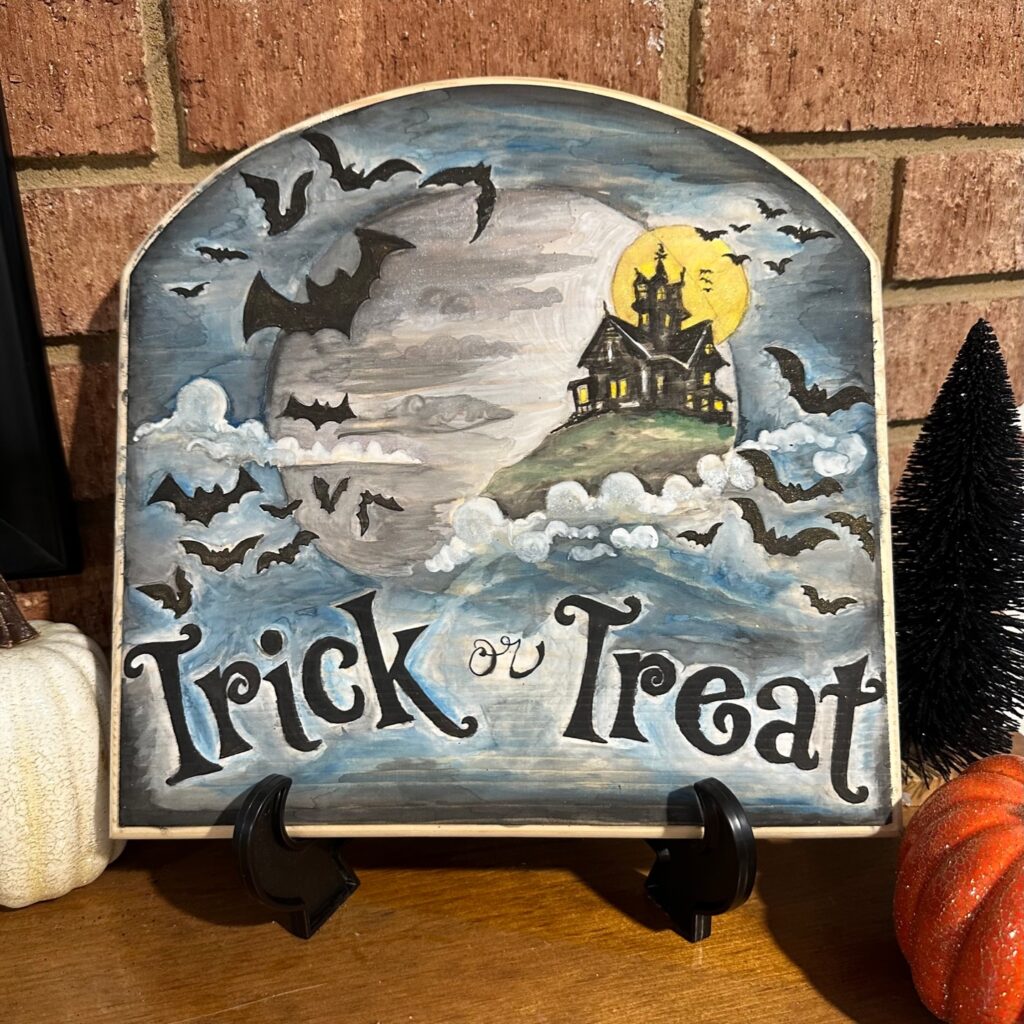
This year, I made this diy Halloween freezer paper transfer watercolor on wood…
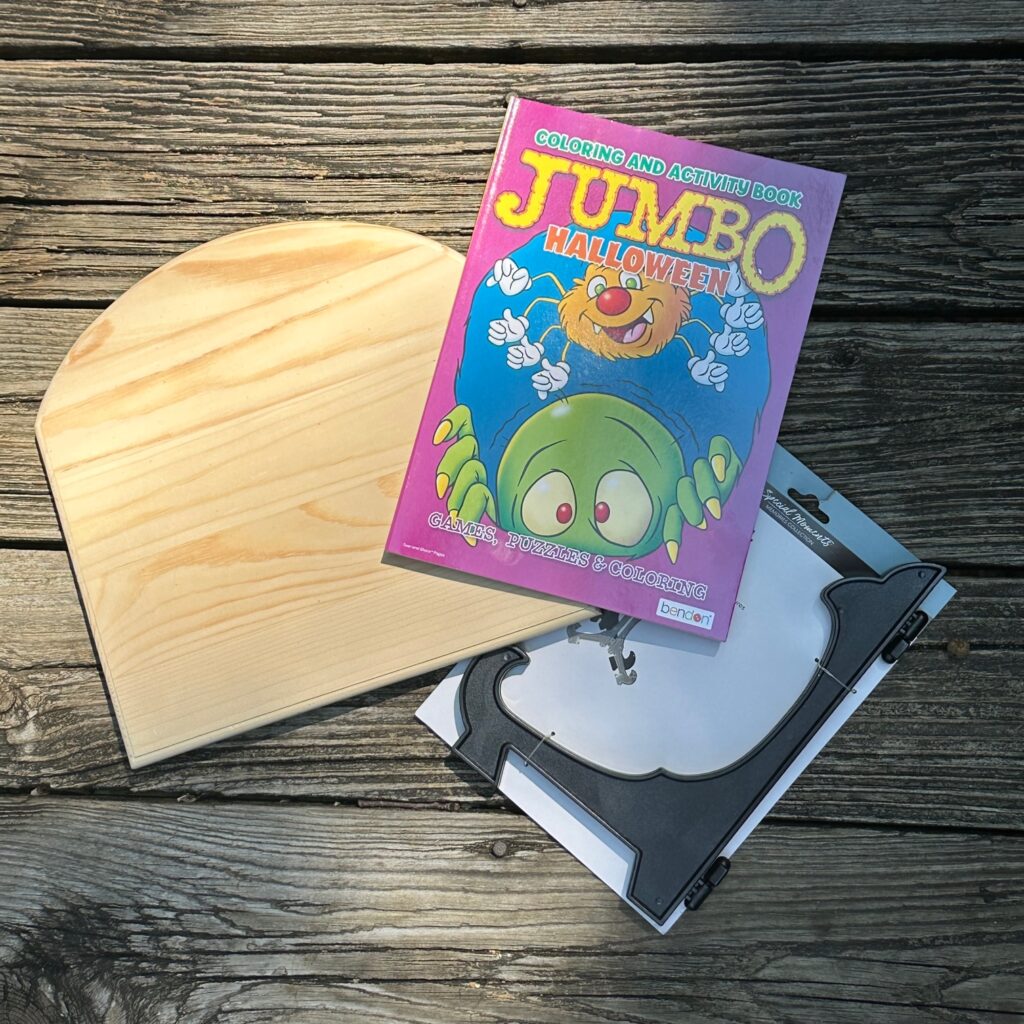
And I started with these Dollar Tree items above.
I’ll show you how I did this fun DIY wooden Halloween sign. You can use any image you’d like and keep it simple or take your project to new “haunted” heights.
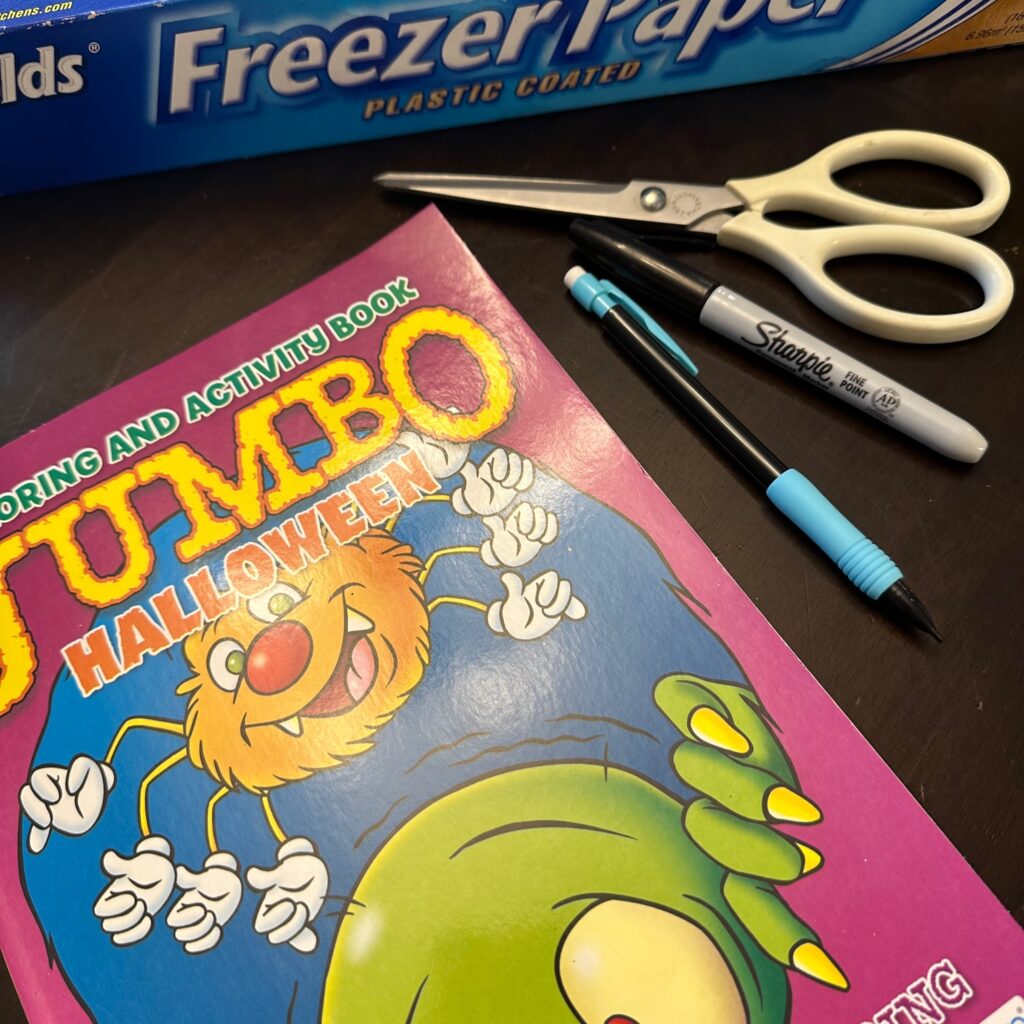
To begin this DIY, gather your supplies.
I used Dollar Tree’s new Halloween coloring book (found in the Halloween section)
freezer paper
scissors
sharpie
mechanical pencil (to avoid having to sharpen as often)
tombstone shaped wood block from Dollar Tree (found in the craft isle next to the small wooden crates)
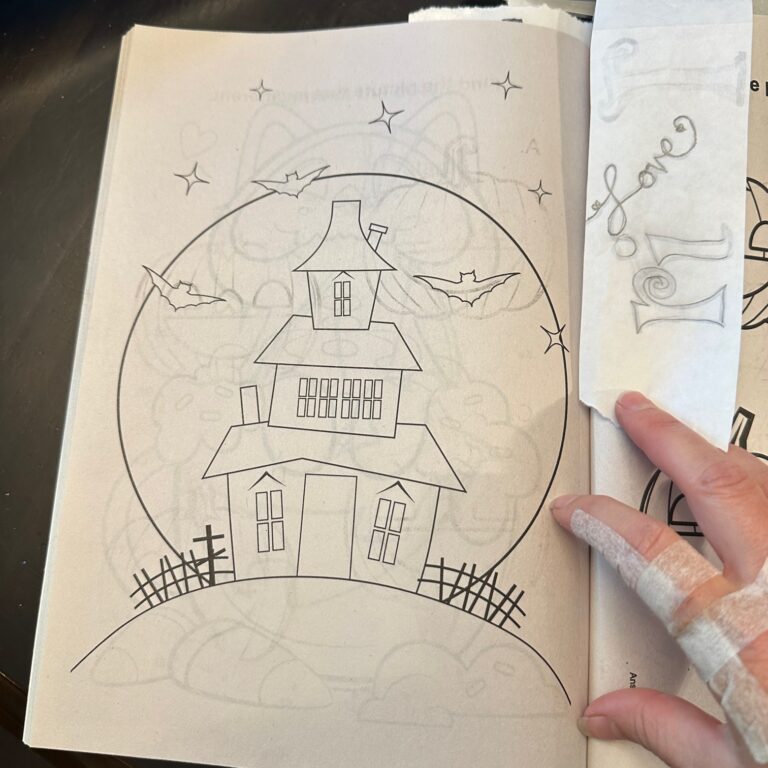
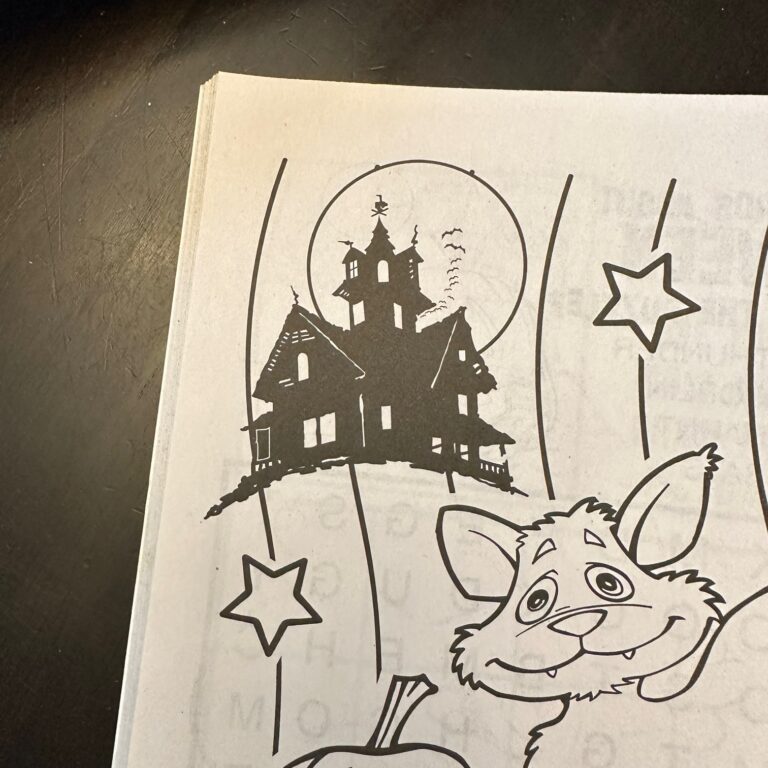
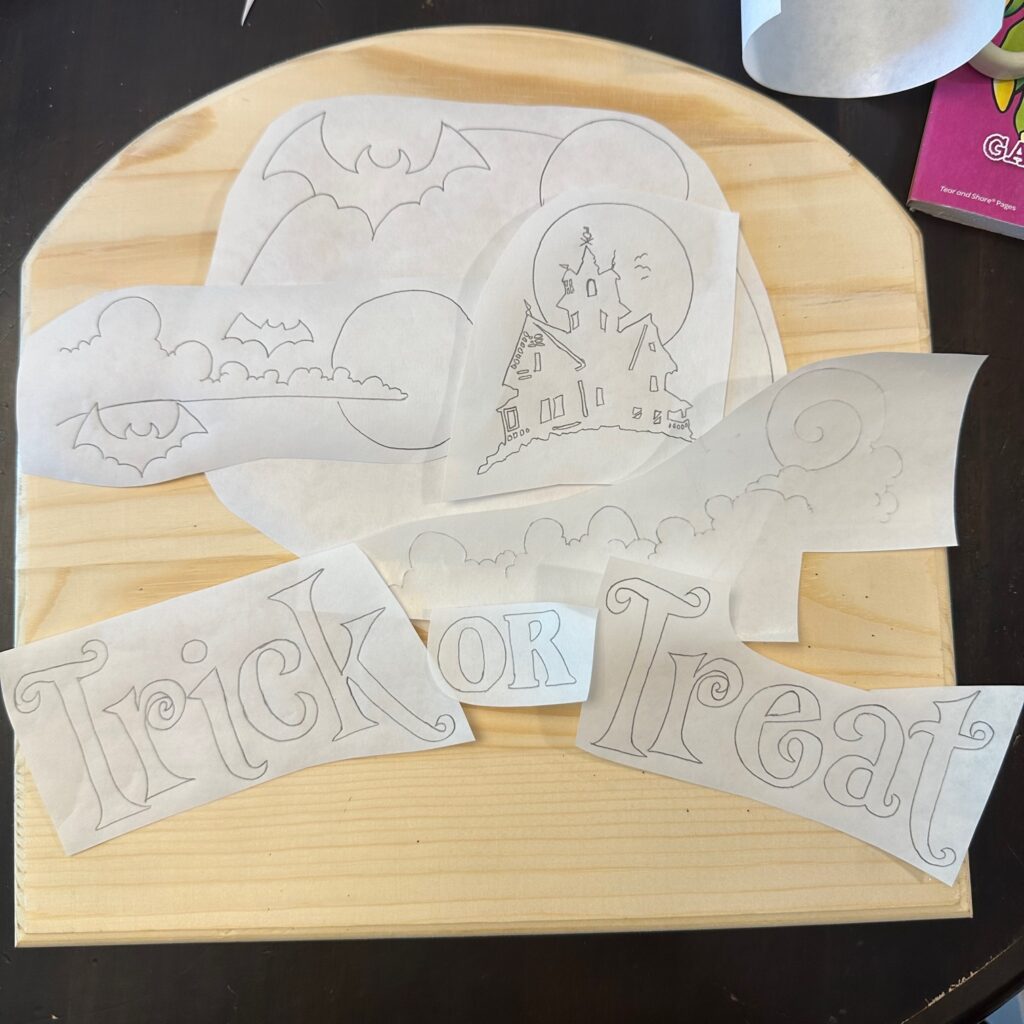
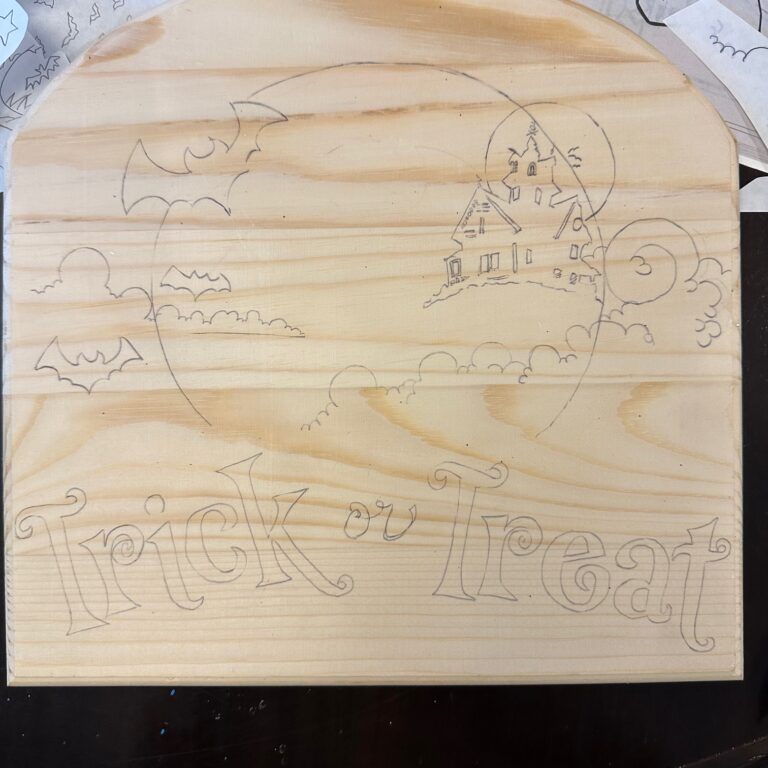
I looked through the coloring book to find some images I liked. These were my favorite…
Transfer Your Images
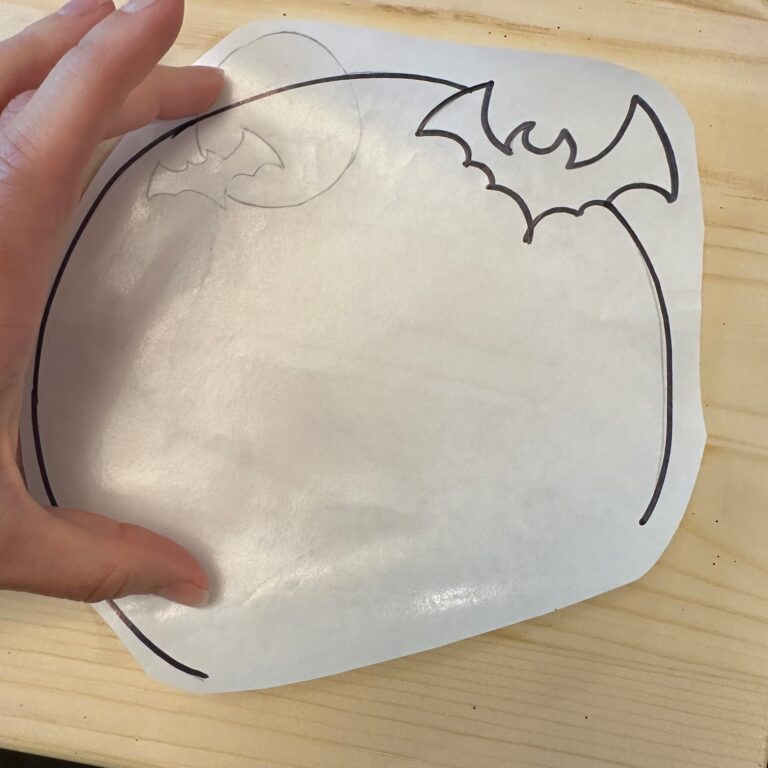
Cut a piece of freezer paper to fit the size of image you’d like to transfer.
I measured the coloring book and cut a big piece because I was interested in using several images for my Halloween sign.
Place the piece of freezer paper over the image you’d like to use shiny side down, and trace, using the mechanical pencil on the non-shiny paper side.
Next, flip the freezer paper over so the shiny side is up and trace the image using the Sharpie marker. You don’t have to scribble thick lines, and you don’t have to be exact when you do this, just make sure to follow the pencil lines from the other side.
Continue these steps until you have all the images you’d like to use in your project.
Plan the Layout
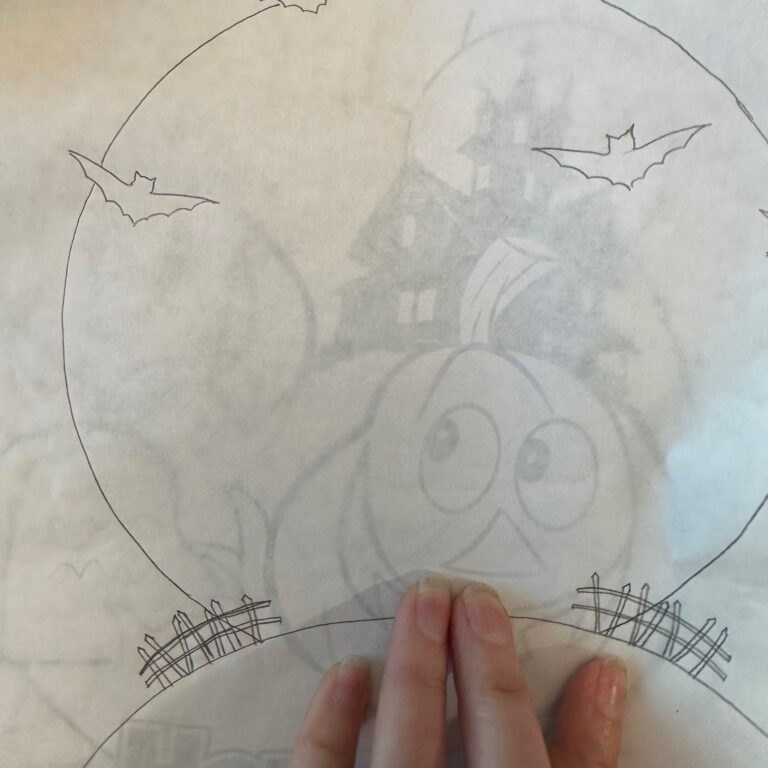
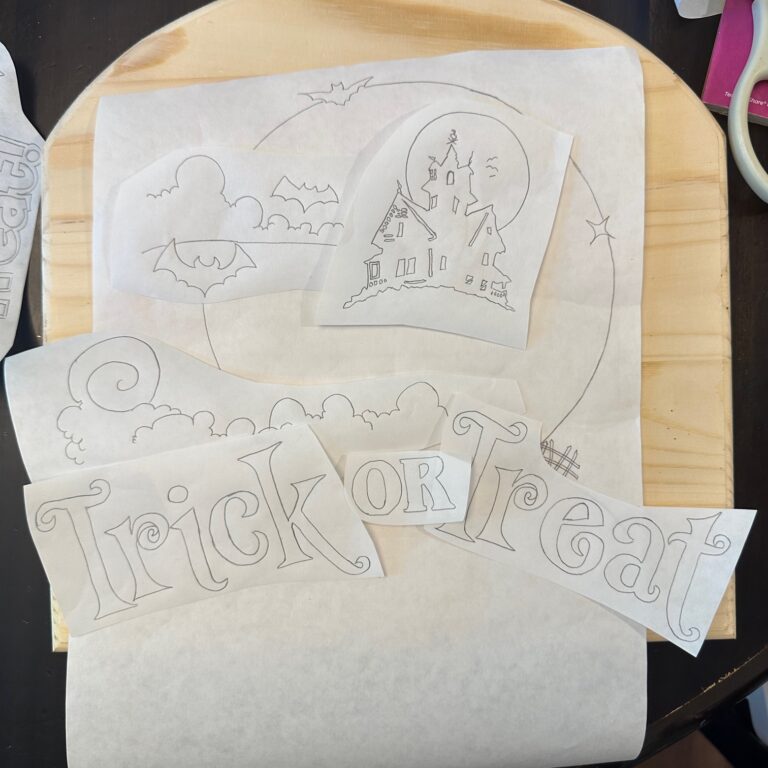
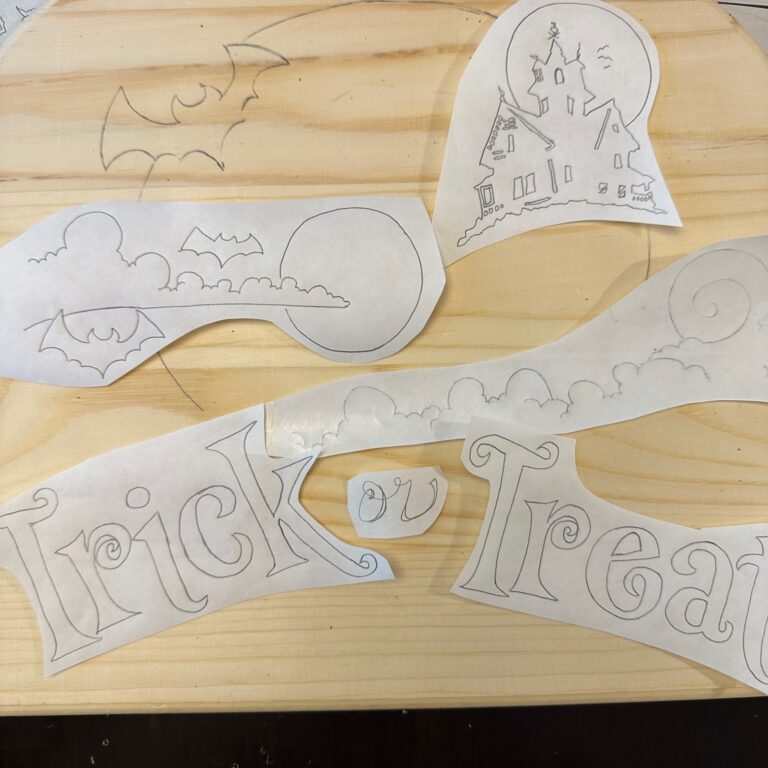
Cut the image/images out so that you can move them around easier in order to decide where you’d like to place each one for the final layout. I moved mine several times before I decided on what I wanted.
I also decided NOT to use every single image I transferred, and some images I only used parts of. It’s ok to “edit” your work beforehand. Try to keep in mind the visual balance of your finished product.
***If this is overwhelming, then just start with one image. That’s what’s nice about this tutorial, you can use this skill to make your own unique piece.***
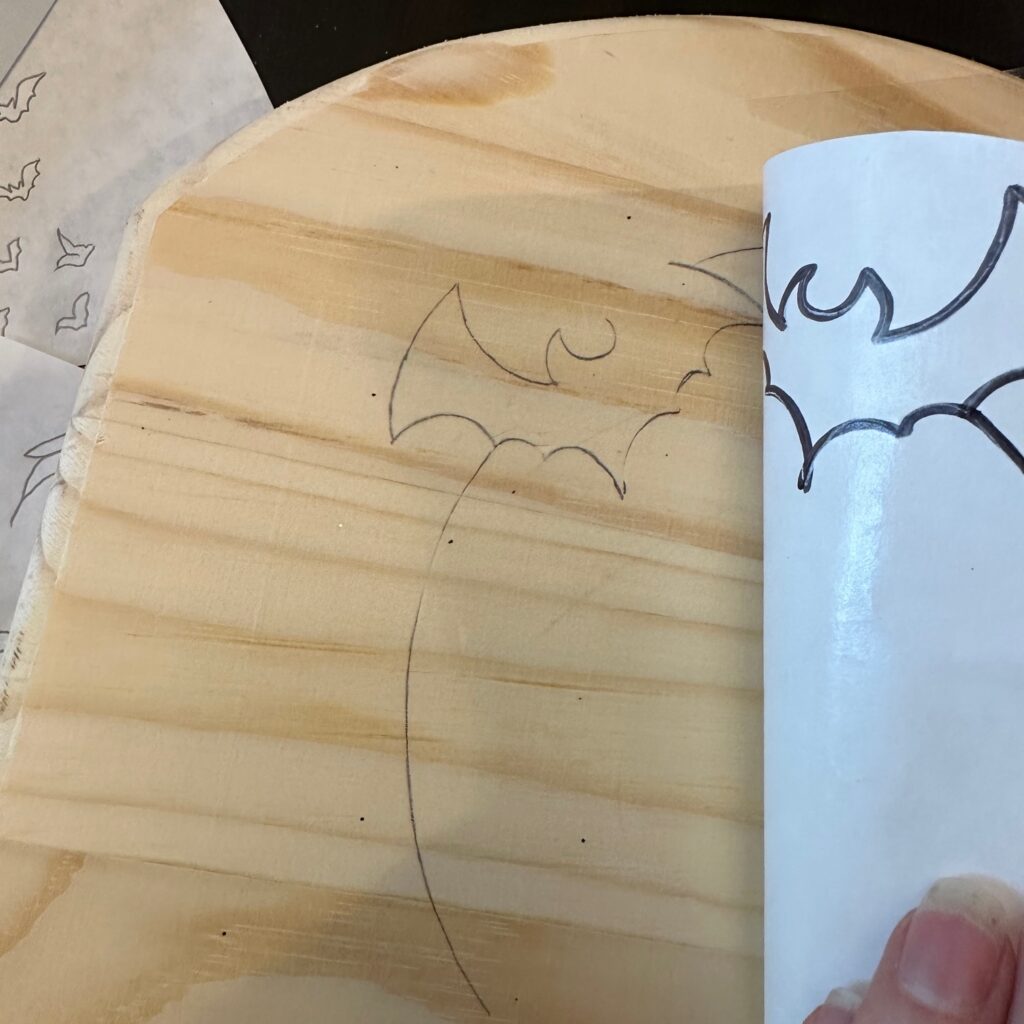
Transfer Image/Images
When you’ve decided where you’d like your image(s), place each image shiny side down. (If you have an image that wants to move around, you can use a small piece of scotch tape to hold it in place.)
Once your image is in place with shiny side down, use your mechanical pencil to trace the image. This will press the Sharpie ink onto the wood. Check the wood a few times to make sure you trace every part of the image.
Color
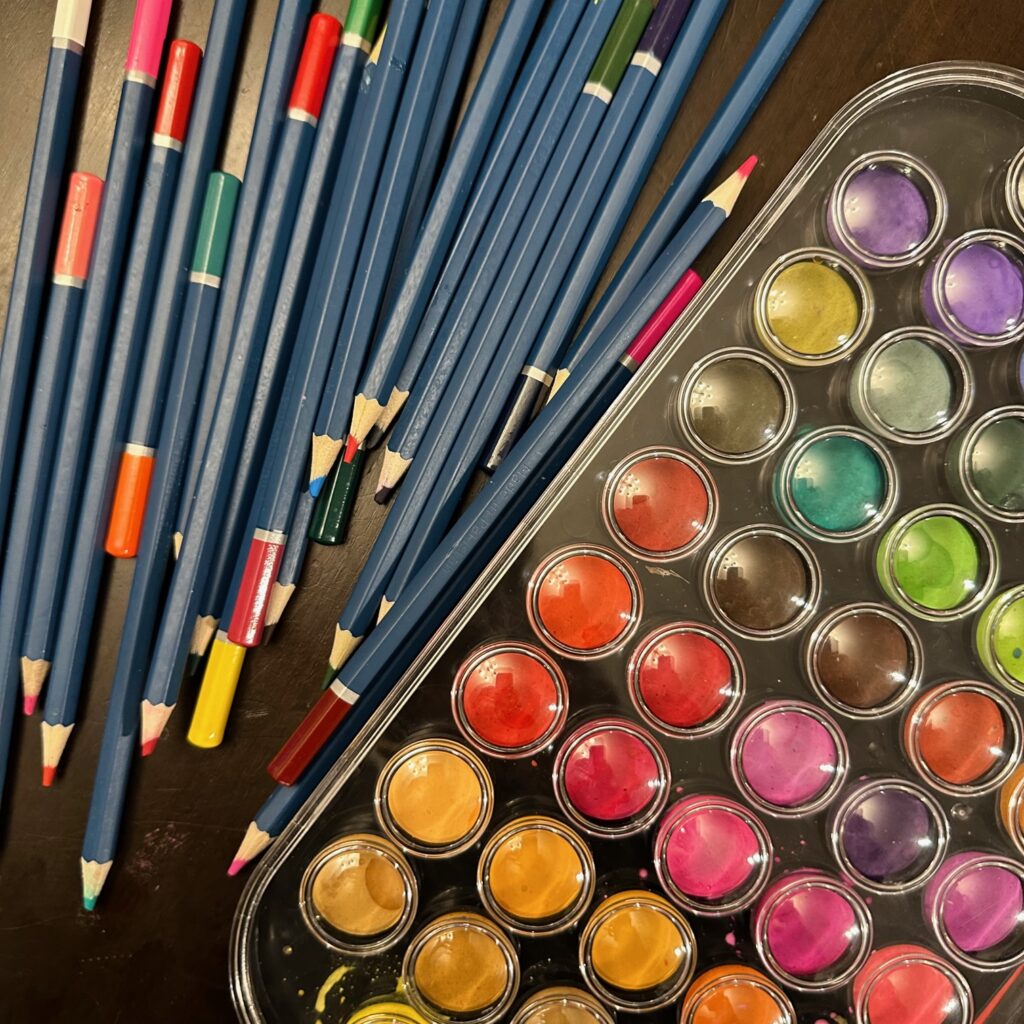
Finally, color your image. I used watercolor paint, and watercolor pencils (again from Dollar Tree). I started with light color behind my images to highlight them before adding color.
Dollar Tree watercolor pencils and water color paints
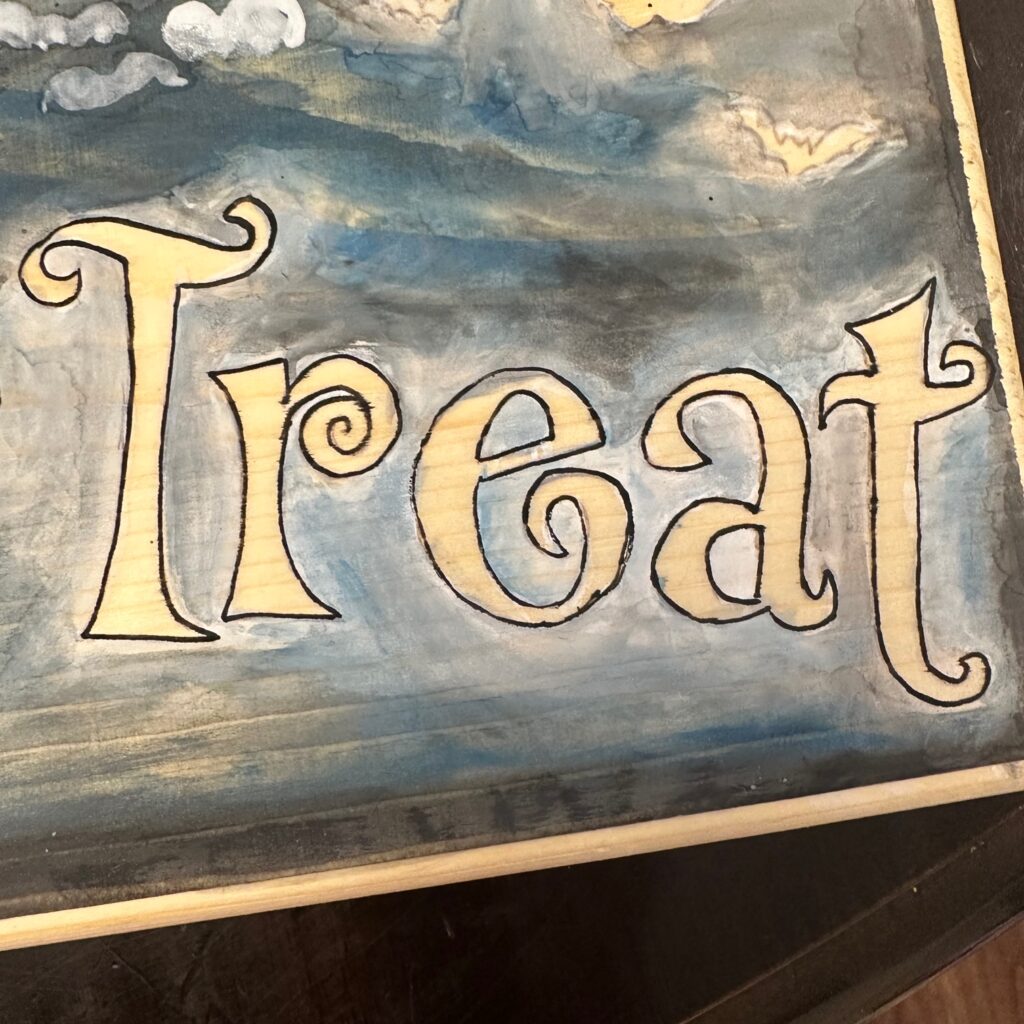
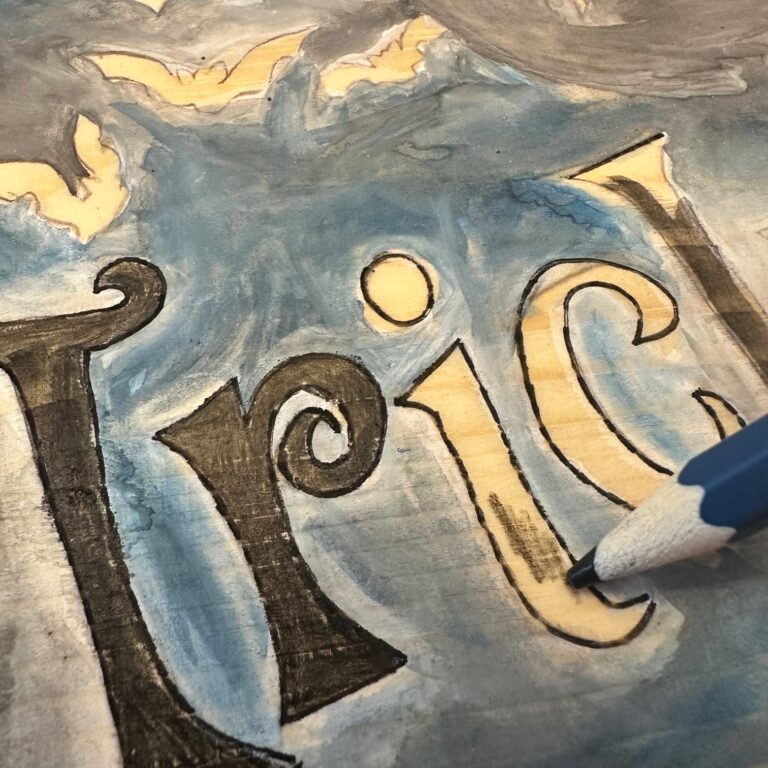
The benefit of watercolor is that it’s ok to allow it to bleed a little bit, and it doesn’t have to be perfect. I was able to allow the colors to flow in order to make the grays and blues in the sky. The watercolors also worked well with the woodgrain and added texture to my painting.
I love using watercolor pencils as well, because I can get a really dark color, while keeping more control over where the colors go.
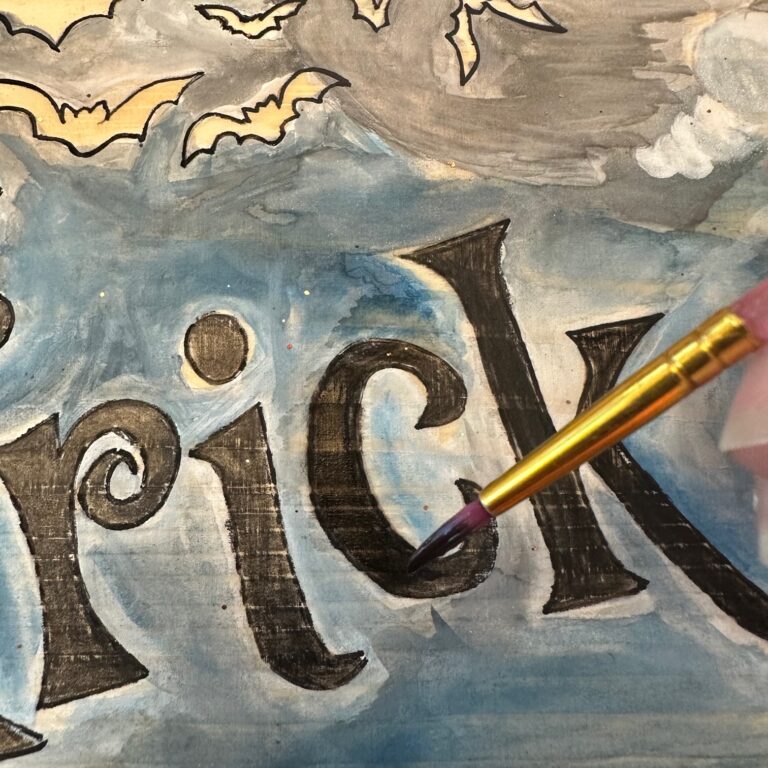
Dark Lettering and Details
For the lettering and dark details in the bats, I outlined each image with a fine Sharpie. Then I colored the inside of the images with a dry watercolor pencil.
After, I used a small paint brush dipped in black watercolor paint to blend in the dry color pencil texture. This enabled the dark color to come out really dark. It especially pops with the contrast of light color behind them.
The images I used in this painting from the Dollar Tree coloring book are all the bats, the haunted house and moon, the big circle behind the hill, the clouds, and the “trick or treat” lettering.
The only part I added myself was the hill that the house is sitting on, and I changed the “or” because the original image was too big to fit where I wanted it.
Don’t be afraid to experiment with this technique. You can use this on paper as well, and make some super cute Halloween cards, or signs. I like using the Dollar Tree coloring books because they have many cute images and when I’m done, I can give the book to my daughters to color. 😊
I would love to see and hear about what you come up with.
Thank you for letting me share this with you. I hope your Halloween and fall season is full of joy!